Pulsar Packages
First we'll start with the Pulsar package system. As we mentioned previously, Pulsar itself is a very basic core of functionality that ships with a number of useful packages that add new features like the Tree View and the Settings View.
In fact, there are more than 80 packages that comprise all of the functionality that is available in Pulsar by default. For example, the Welcome screen that you see when you first start Pulsar, the spell checker, the themes and the Fuzzy Finder are all packages that are separately maintained and all use the same APIs that you have access to, as we'll see in great detail in Hacking the Core.
This means that packages can be incredibly powerful and can change everything from the very look and feel of the entire interface to the basic operation of even core functionality.
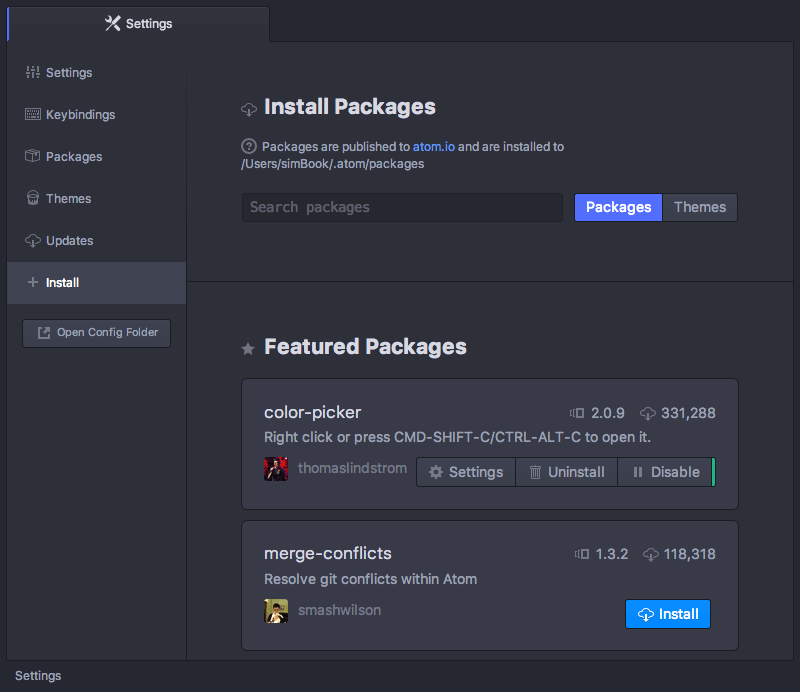
In order to install a new package, you can use the Install tab in the now familiar Settings View. Open up the Settings View using LNX/WIN: Ctrl+, - MAC: Cmd+, click on the "Install" tab and type your search query into the box under Install Packages.
The packages listed here have been published to https://web.pulsar-edit.dev which is the official registry for Pulsar packages. Searching on the Settings View will go to the Pulsar package registry and pull in anything that matches your search terms.

All of the packages will come up with an "Install" button. Clicking that will download the package and install it. Your editor will now have the functionality that the package provides.
Package Settings
Once a package is installed in Pulsar, it will show up in the Settings View under the "Packages" tab, along with all the pre-installed packages that come with Pulsar. To filter the list in order to find one, you can type into search box directly under the "Installed Packages" heading.

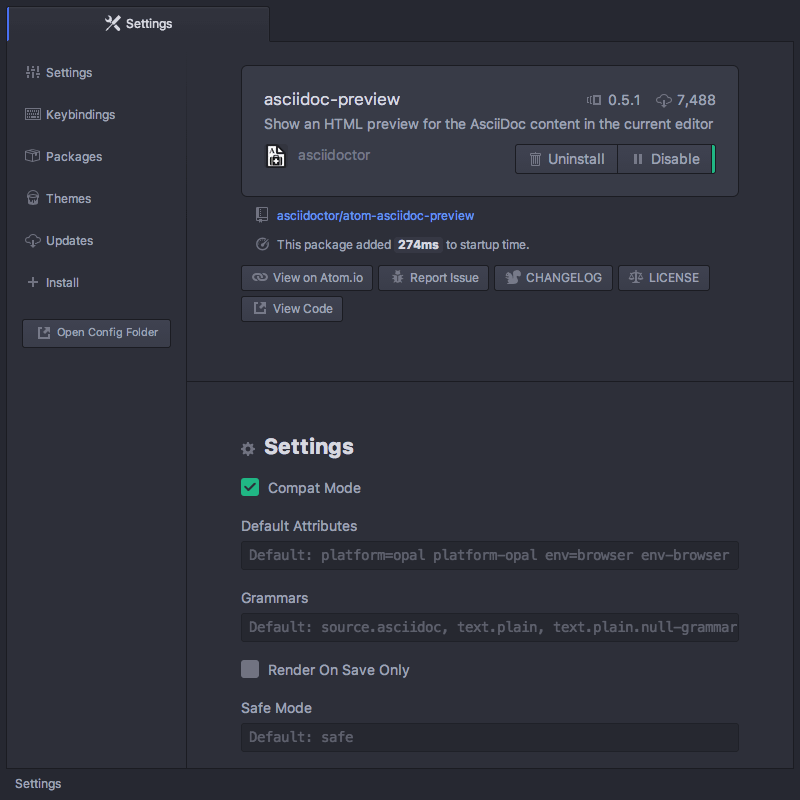
Clicking on the "Settings" button for a package will give you the settings screen for that package specifically. Here you have the option of changing some of the default variables for the package, seeing what all the command keybindings are, disabling the package temporarily, looking at the source code, seeing the current version of the package, reporting issues and uninstalling the package.
If a new version of any of your packages is released, Pulsar will automatically detect it and you can upgrade the package from either this screen or from the "Updates" tab. This helps you easily keep all your installed packages up to date.
Pulsar Themes
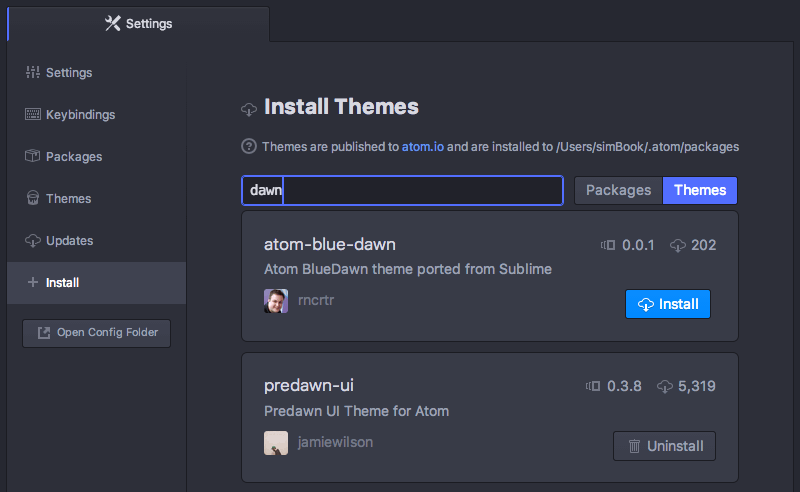
You can also find and install new themes for Pulsar from the Settings View. These can be either UI themes or syntax themes and you can search for them from the "Install" tab, just like searching for new packages. Make sure to press the "Themes" toggle next to the search box.

Clicking on the theme title will take you to a profile page for the theme on pulsar-edit.dev, which often has a screenshot of the theme. This way you can see what it looks like before installing it.
Clicking on "Install" will install the theme and make it available in the Theme dropdowns as we saw in Changing the Theme.

Command Line
You can also install packages or themes from the command line using ppm (Pulsar Package Manager). This is used by running pulsar -p <commmand> or pulsar --package <command>.
Tip
Check that you have ppm available by running the following command in your terminal:
$ pulsar -p help install
You should see a message print out with details about the pulsar -p install command.
If you do not, see the Installing Pulsar section for instructions on how to install the pulsar command for your system.
You can install packages by using the pulsar -p install command:
pulsar -p install <package_name>to install the latest version.pulsar -p install <package_name>@<package_version>to install a specific version.
For example pulsar -p install minimap@4.40.0 installs the 4.40.0 release of the minimap package.
You can also use ppm to find new packages to install. If you run pulsar -p search, you can search the package registry for a search term.
$ pulsar -p search linter
> Search Results For 'linter' (30)
> ├── linter A Base Linter with Cow Powers (9863242 downloads, 4757 stars)
> ├── linter-ui-default Default UI for the Linter package (7755748 downloads, 1201 stars)
> ├── linter-eslint Lint JavaScript on the fly, using ESLint (v7 or older) (2418043 downloads, 1660 stars)
> ├── linter-jshint Linter plugin for JavaScript, using jshint (1202044 downloads, 1271 stars)
> ├── linter-gcc Lint C and C++ source files using gcc / g++ (863989 downloads, 194 stars)
> ...
> ├── linter-shellcheck Lint Bash on the fly, using shellcheck (136938 downloads, 280 stars)
> └── linter-rust Lint Rust-files, using rustc and/or cargo (132550 downloads, 91 stars)
You can use pulsar -p view to see more information about a specific package.
$ pulsar -p view linter
> linter
> ├── 3.4.0
> ├── https://github.com/steelbrain/linter
> ├── A Base Linter with Cow Powers
> ├── 9863242 downloads
> └── 4757 stars
>
> Run `pulsar -p install linter` to install this package.
Using ppm to install from other sources
By default ppm will be using the Pulsar Package Repository. However you can also use it to install from other locations which can be useful if you are trying to install a package not published to the Pulsar Package Repository.
Github or Git Remotes
Pulsar can install from a GitHub repository or any valid git remote url. The -b option can then be used to specify a particular tag or branch.
Git remotepulsar -p install <git_remote> [-b <branch_or_tag>]
GitHubpulsar -p install <github_username>/<github_project> [-b <branch_or_tag>]
For example to install the Generic-LSP package from GitHub you could use either:
pulsar -p install https://github.com/mauricioszabo/generic-lsp/
or
pulsar -p install mauricioszabo/generic-lsp
This will use the current HEAD commit of the default branch. If you want to install a specific version from a branch or tag then use the -b option:
e.g. pulsar -p install https://github.com/mauricioszabo/generic-lsp/ -b v1.0.3